
The following method is more suited for artists who feel comfortable playing with both aspects of modelling, as much on the high-poly side as the low-poly side. Even if you have a good amount of skills making pretty things in ZBrush/Maya/Blender/etc, keep in mind it’s merely step 1 of this entire process.
There is some precision and care required to make a good low-poly mesh, way more than a good-looking X millions polygons asset made of intersecting parts and/or brush strokes in a sculpting software.
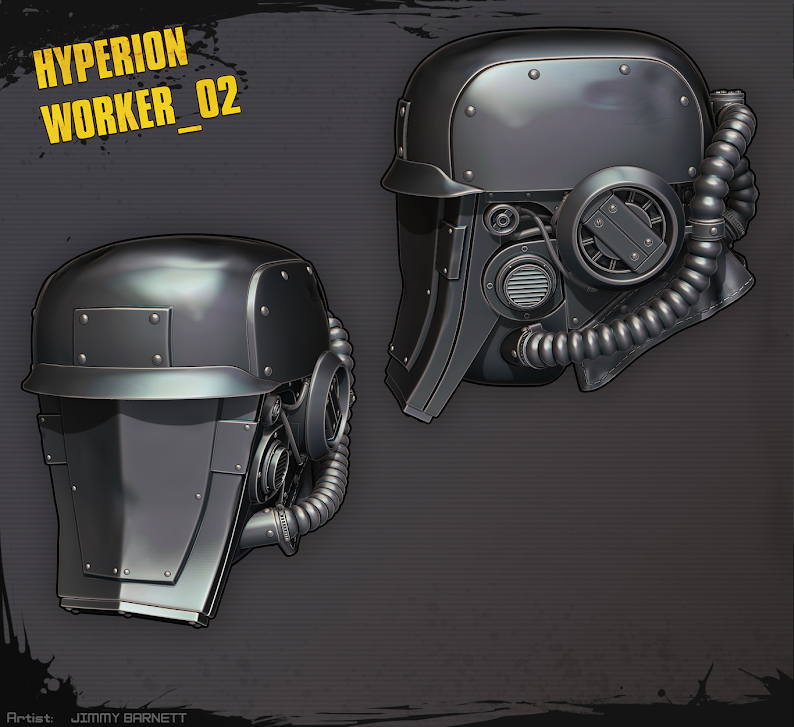
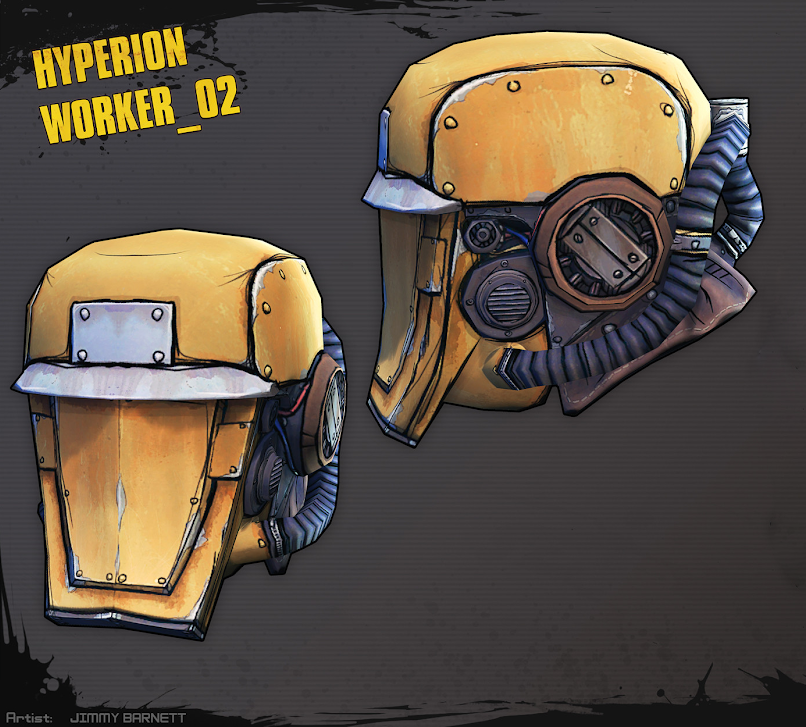
by Jimmy Barnet ©Gearbox Software, LLC
A quick demo of how fast and flexible the baking process is once you’ve set up your files correctly.
Step 01 - Start from your high resolution mesh
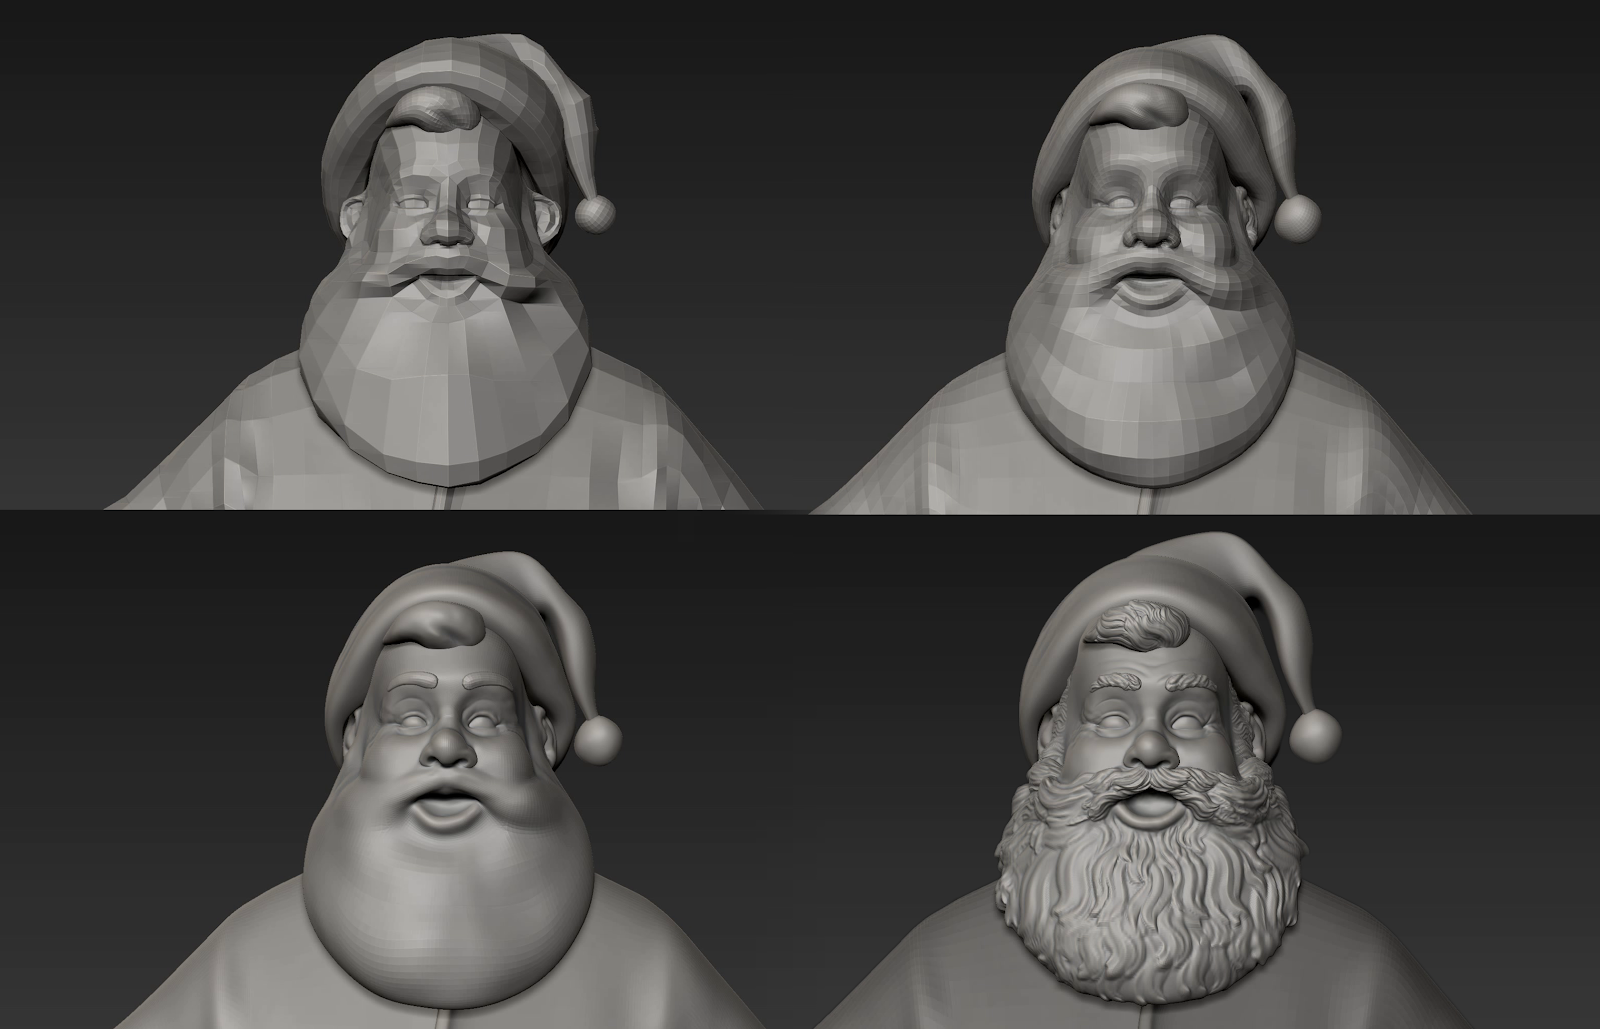
Create your high resolution object in the software of your choice. With this pipeline we could use the most detailed and high-resolution version of our assets, in ZBrush, using >1 Mil polygons meshes, just for the sake of trying to see how much of these details we could get back. There’s no need to go too high if you’re going to compress your map a lot in the end, but this is an approach where details don’t depend on your basemesh polygons placement.
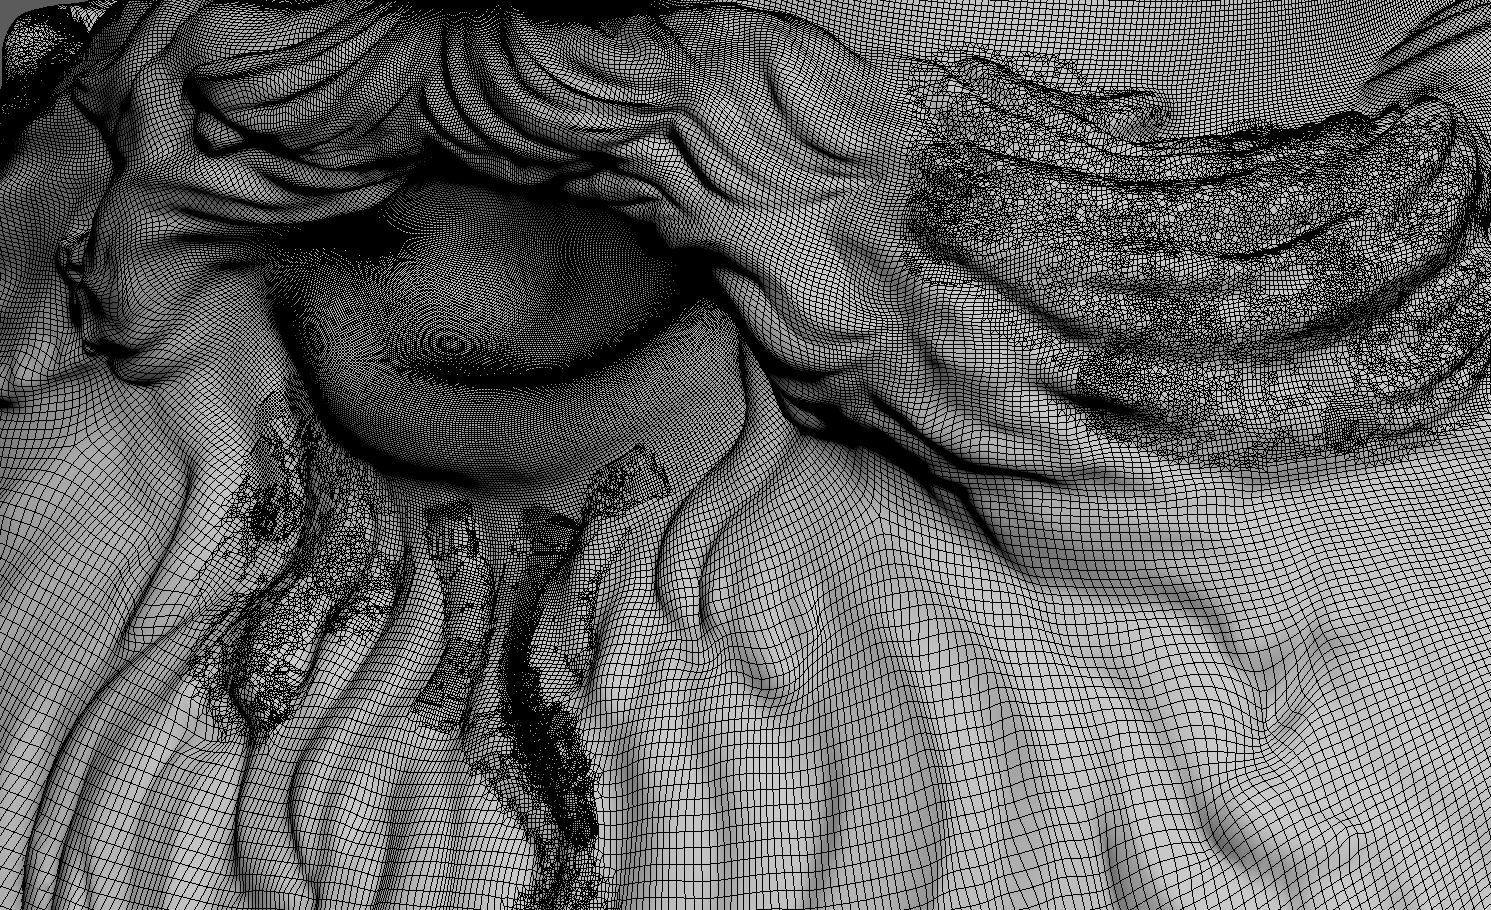
I even used sculptris features in ZBrush in some places where I didn’t get the details I wanted.
The idea is to get all the chamfers, curves, small details and brush strokes your design needs.
Step 02 - Creating a low resolution mesh
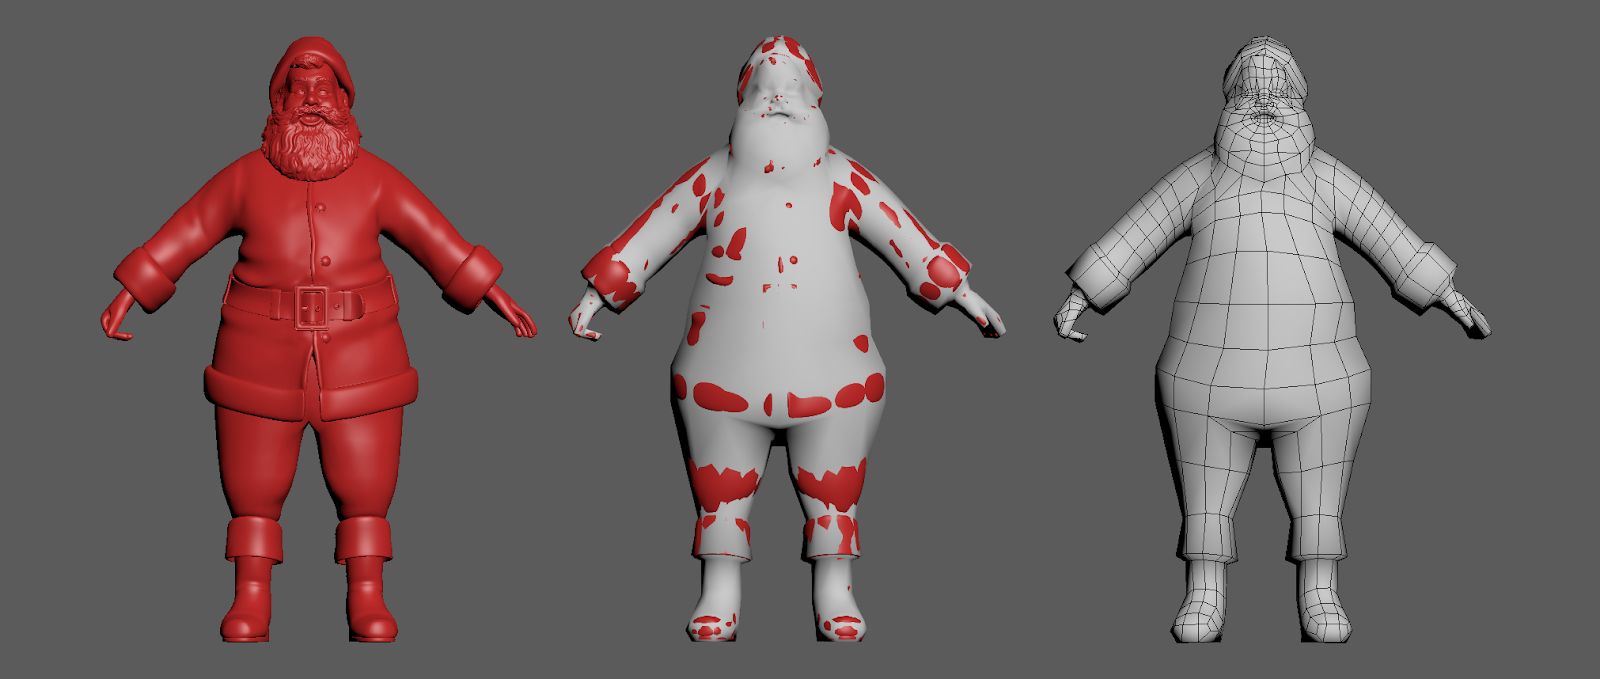
This is the hardest part. For every 10, 100, 1000... polygons you have you might have only one vertex to place. Your Low poly mesh needs to overlap your High poly mesh as much as it can.
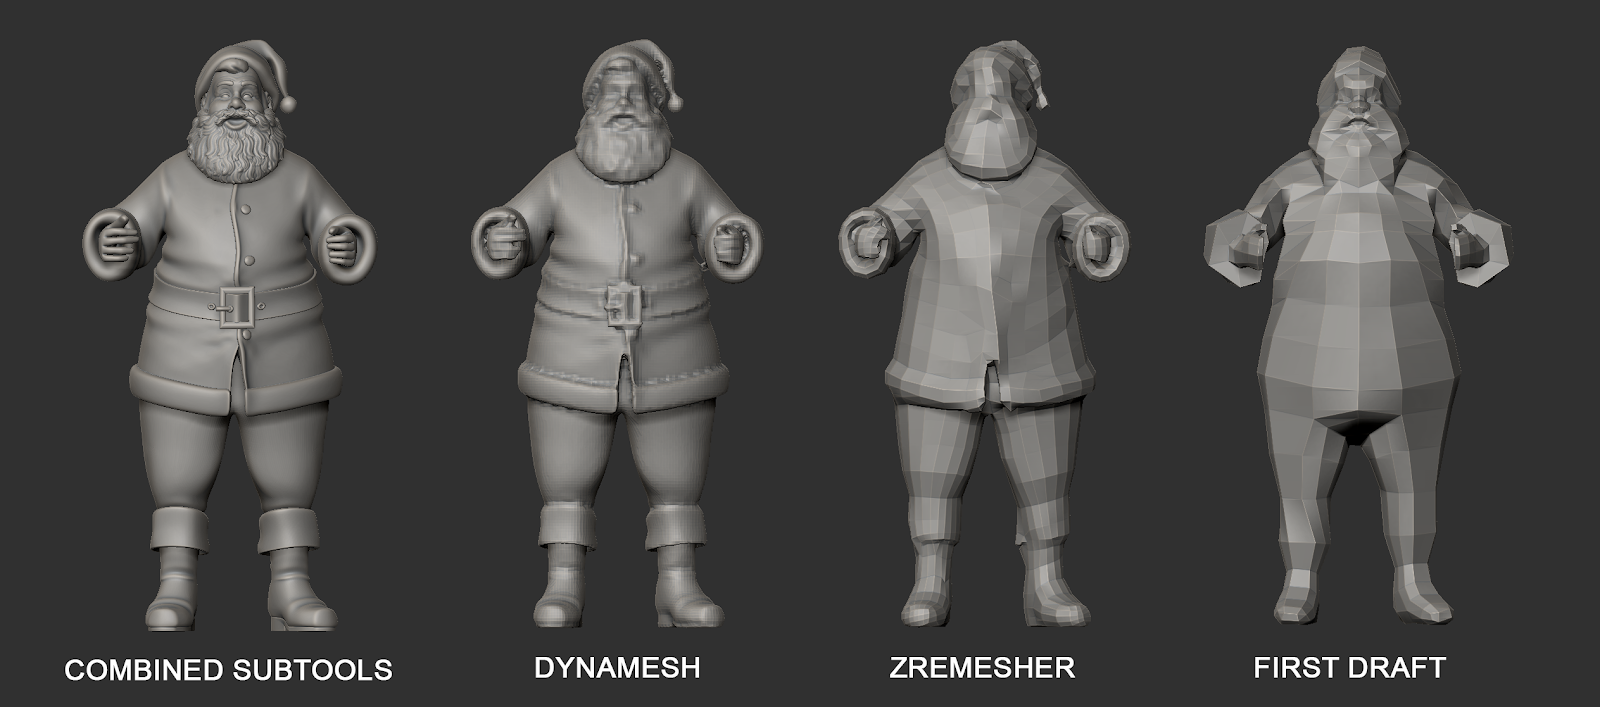
[ZBrush users: Feel free to take your high polygon model and Merge all subtools > Dynamesh > ZRemesh to your polygon goal to give yourself an idea of how far you will be able to detail your object.
I even used ZBrush Use PolyPaint approach to ZRemesher to give the low resolution mesh more details in places I judged the asset would need more resolution.]
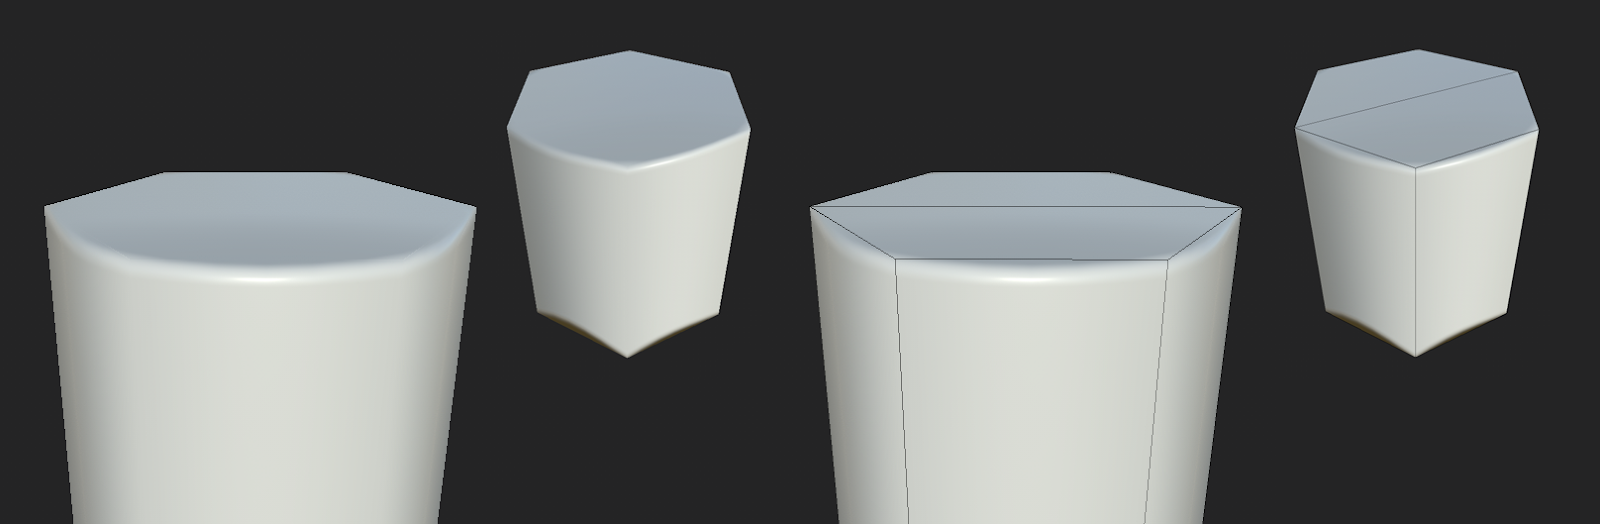
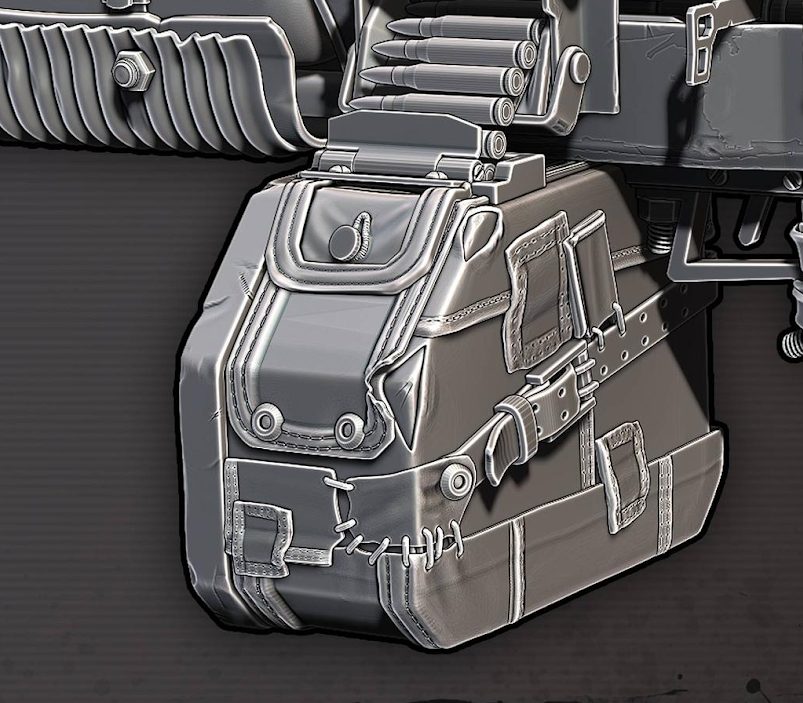
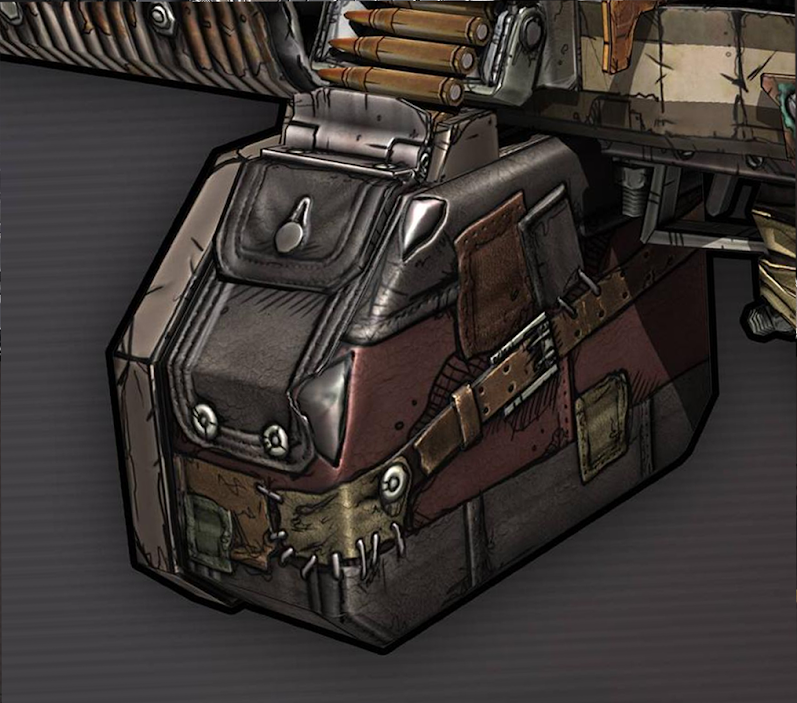
This part involves a lot of manual tweaks, and you might go back to it once you start baking your model to fix or move a few vertices around. Normals are only good within a certain tolerance between the low and high poly meshes.
Video games assets get away with a lot more than you’ve been used to. There’s no displacement, only normals, and sometimes an asset who appears cylindrical and smooth from afar might be a 6 sides cylinder with just good baking work.
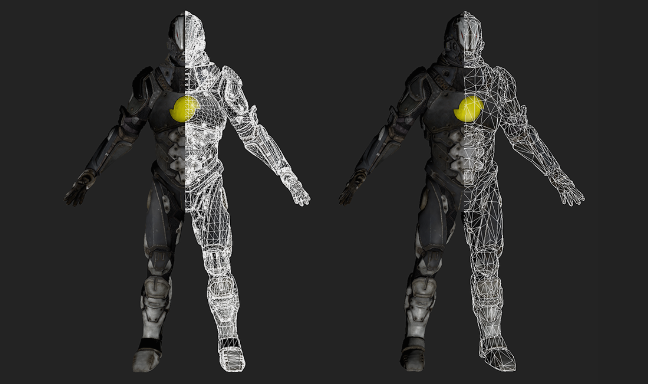
You will not reach the level they can achieve with hyper triangulated meshes, either done manually or with tools like Simplygon or mastering Decimation tools in ZBrush, but only because it would be hard for anyone else but you to understand your mesh and edit your work afterwards.
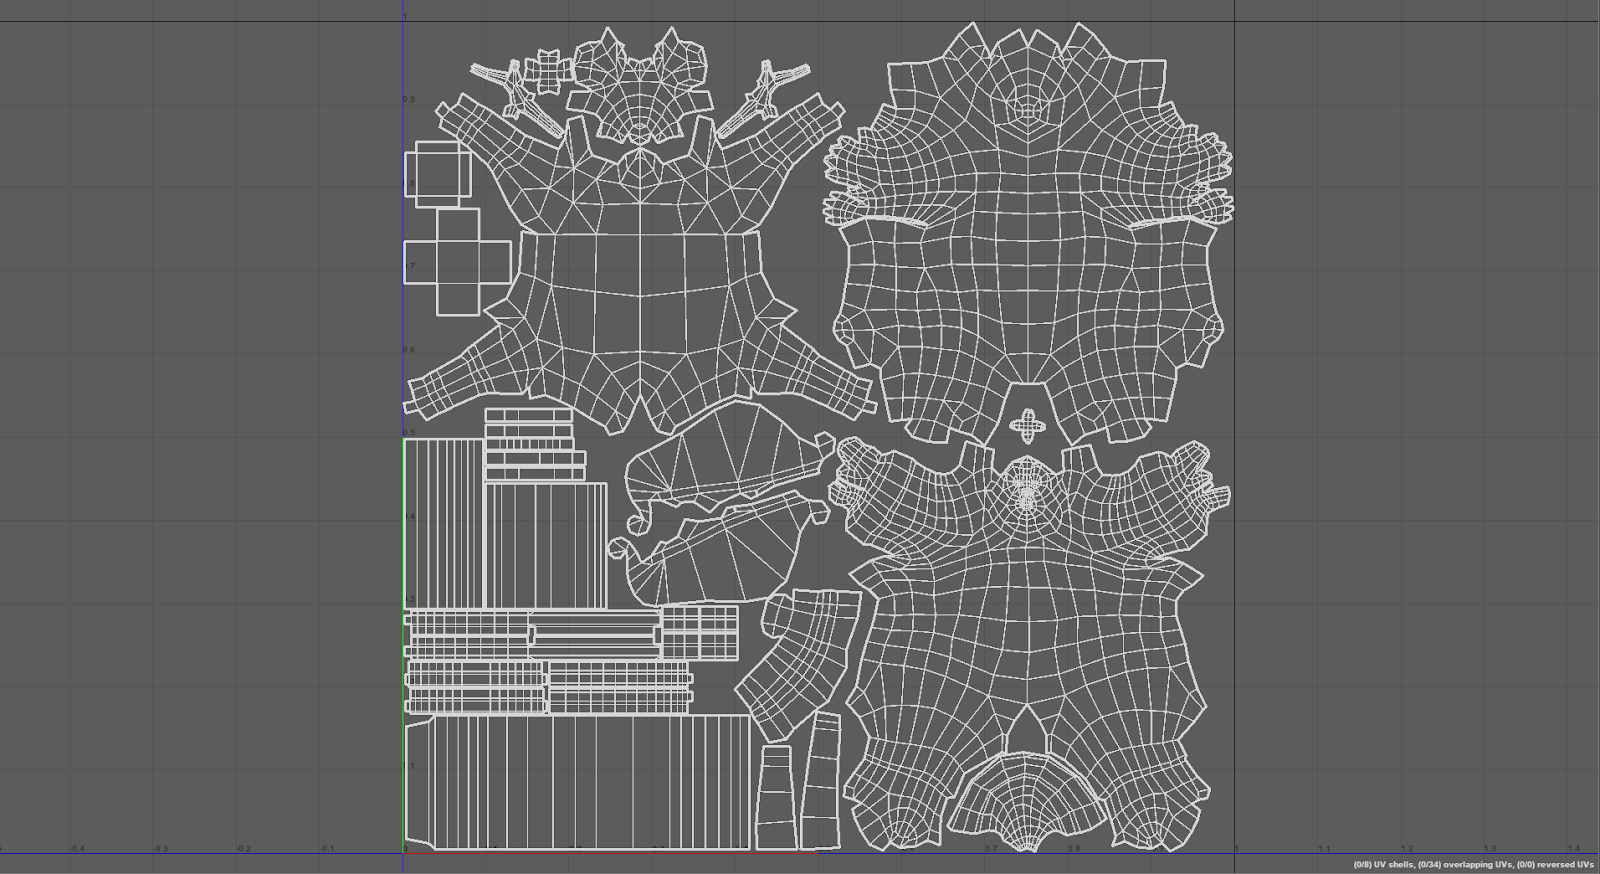
UV your mesh as well as you can. Most real-time softwares won’t have the same flexibility and intelligence with seems that you’ve experienced in softwares doing rendered works. UV seams on visible parts, seams on the face and parts you want to see more closely have to be used with parsimony.
This is where you will set the bases for your texture (and details) resolution and extra savings, to create your texture atlas. (For more information on texture atlases see Appendix A.)
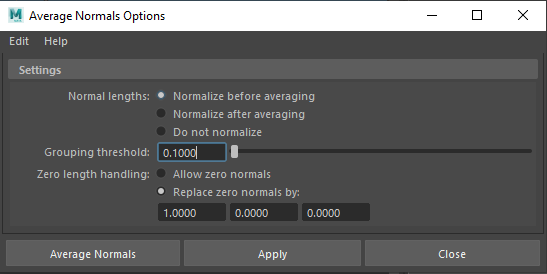
If you’re in Maya, it’s a good idea to perform an Average Normals function on the low mesh, to relax a little the canvas you’re going to project your normals on.
There are also recommendations to triangulate your mesh, as many of
these real time softwares will interpret your quads as such in the end
anyway. Just save your file before and triangulate it for the final export
if you want to export for Unity or
Unreal for example.
Step 03 - Baking your High Definition Mesh
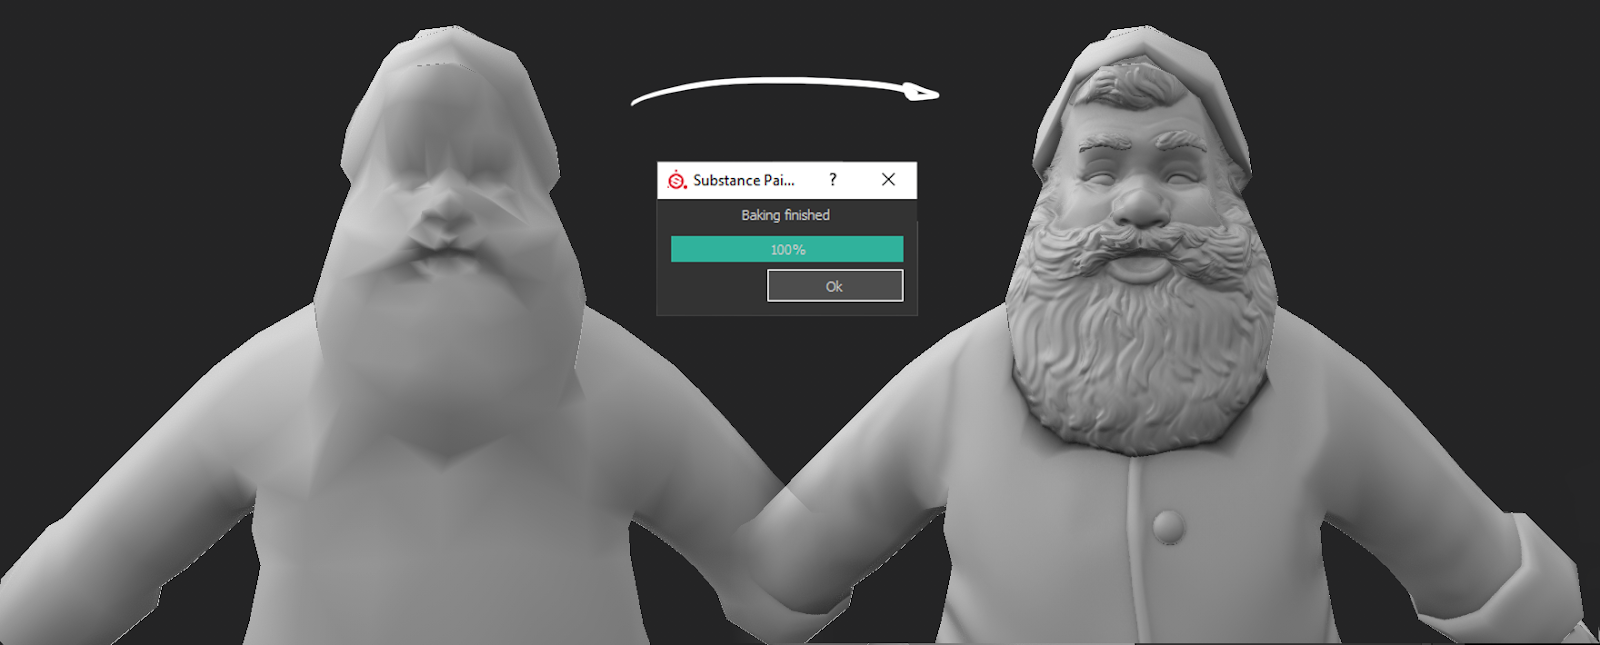
Now in Substance Painter: go to TEXTURE SET SETTINGS > Mesh maps > Bake Mesh Maps.

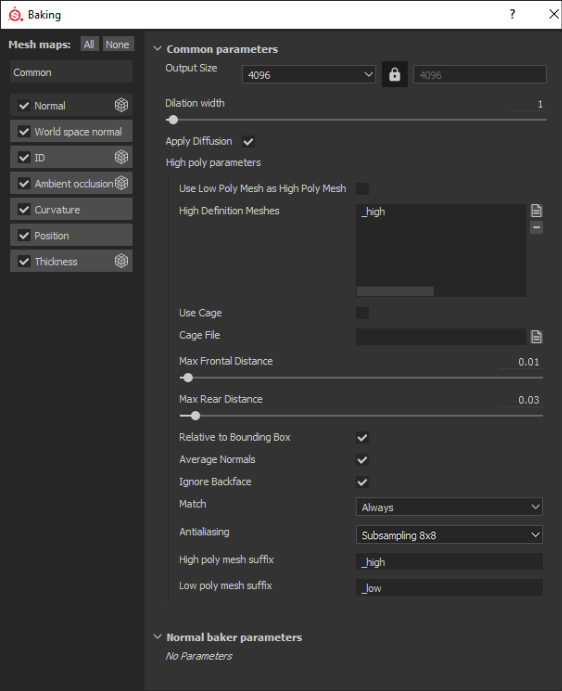
Output size: size of the mesh maps, not the
document. You’ll get better results by baking your map slightly
higher than your mesh. Even if the result is supposed to be 1K, 2K
normals, curvature and thickness will give better results with
lighting and smart materials.
Just keep in mind baking every
mesh map high might slow down your computer, if it’s on the weaker
side.
Dilatation width: The dilation width is how much padding around the uv shells you want to get.
Use cage: Leave unchecked. (For baking with the use of a cage, see Appendix B)
Max Frontal Distance: The distance the rays will
shoot outward looking for geometry
Max Rear Distance:
Same as frontal but in the opposite direction.
Relative to Bounding Box: Leave checked
Average Normals: Leave checked. It will smooth out
your high poly mesh normals
Ignore Backface: Leave checked
Match by Sub-Meshes Name: Leave unchecked if you want to bake only one high-poly mesh (made of multiple objects or not) on one low-poly. (Go to Appendix C to see how to bake multiple meshes on multiple meshes.)
Antialiasing: By default set to none, max it as much as you can on your machine (so 8x8).
Step 04 - Paint your Low Definition Mesh
Now it’s time to paint your textures in Substance Painter and you should be good to go!
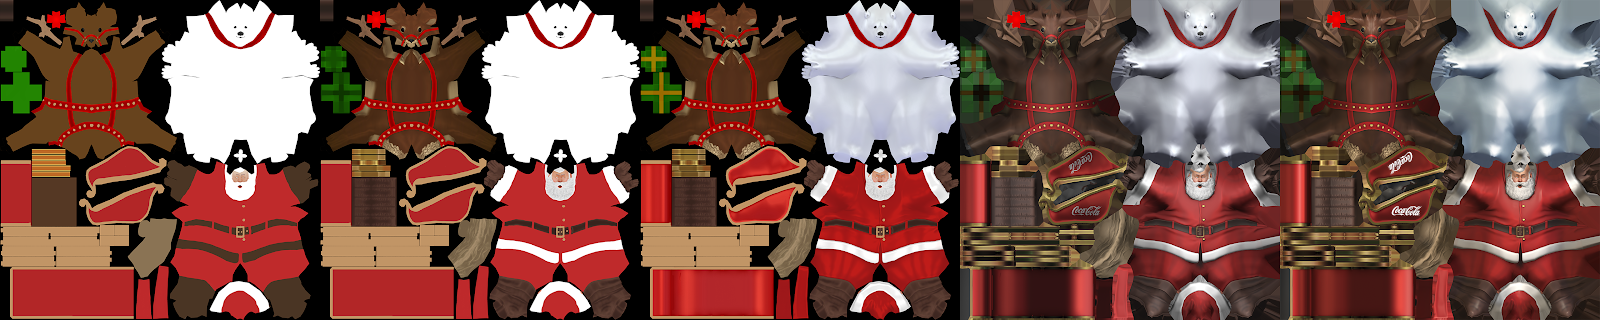
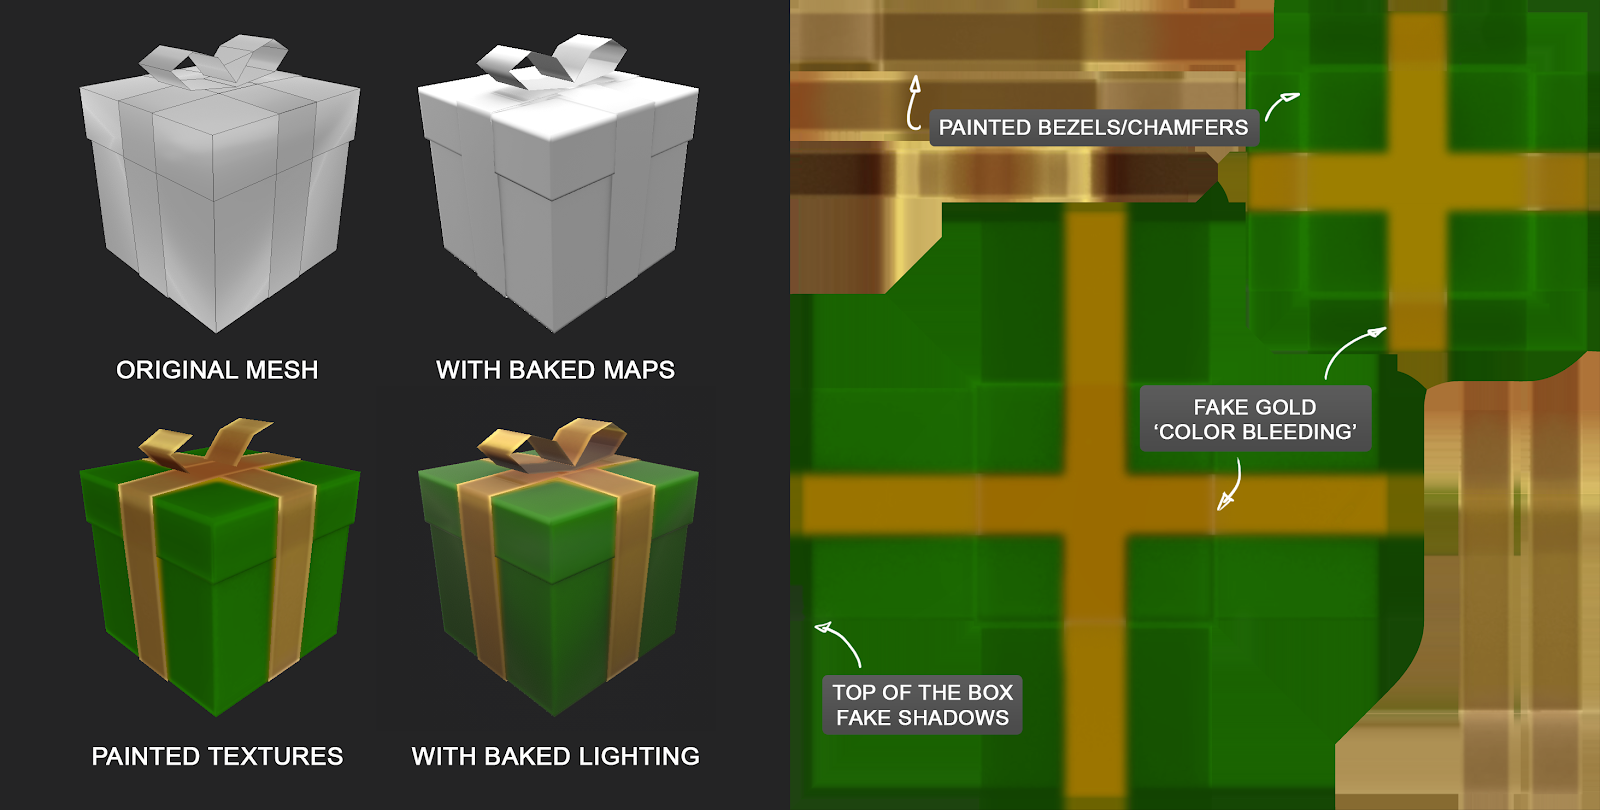
It took a few tries to get all if it looking exactly the way we wanted to. Sometimes on a project you will only get to use a Normal map, specular and diffuse. Sometimes just the diffuse. Just filling the painted geo when you get one diffuse would not get us the results we wanted.
It would be almost worth an entire document to talk about texturing this way (kind of Blizzard / Jam City texturing process for example, with -almost- no realtime shadows, complex AO, heavy multidirectional rim lighting and stylized metals).
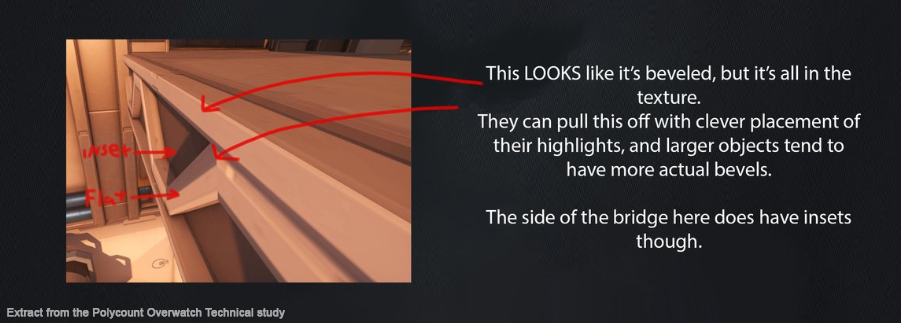
Timothy Bermanseder has an incredible breakdown of some work from Overwatch that goes through environment, characters and more to explain how they stylised their worlds and heroes.
You will recognize some of the effects and techniques we’ve used in it.
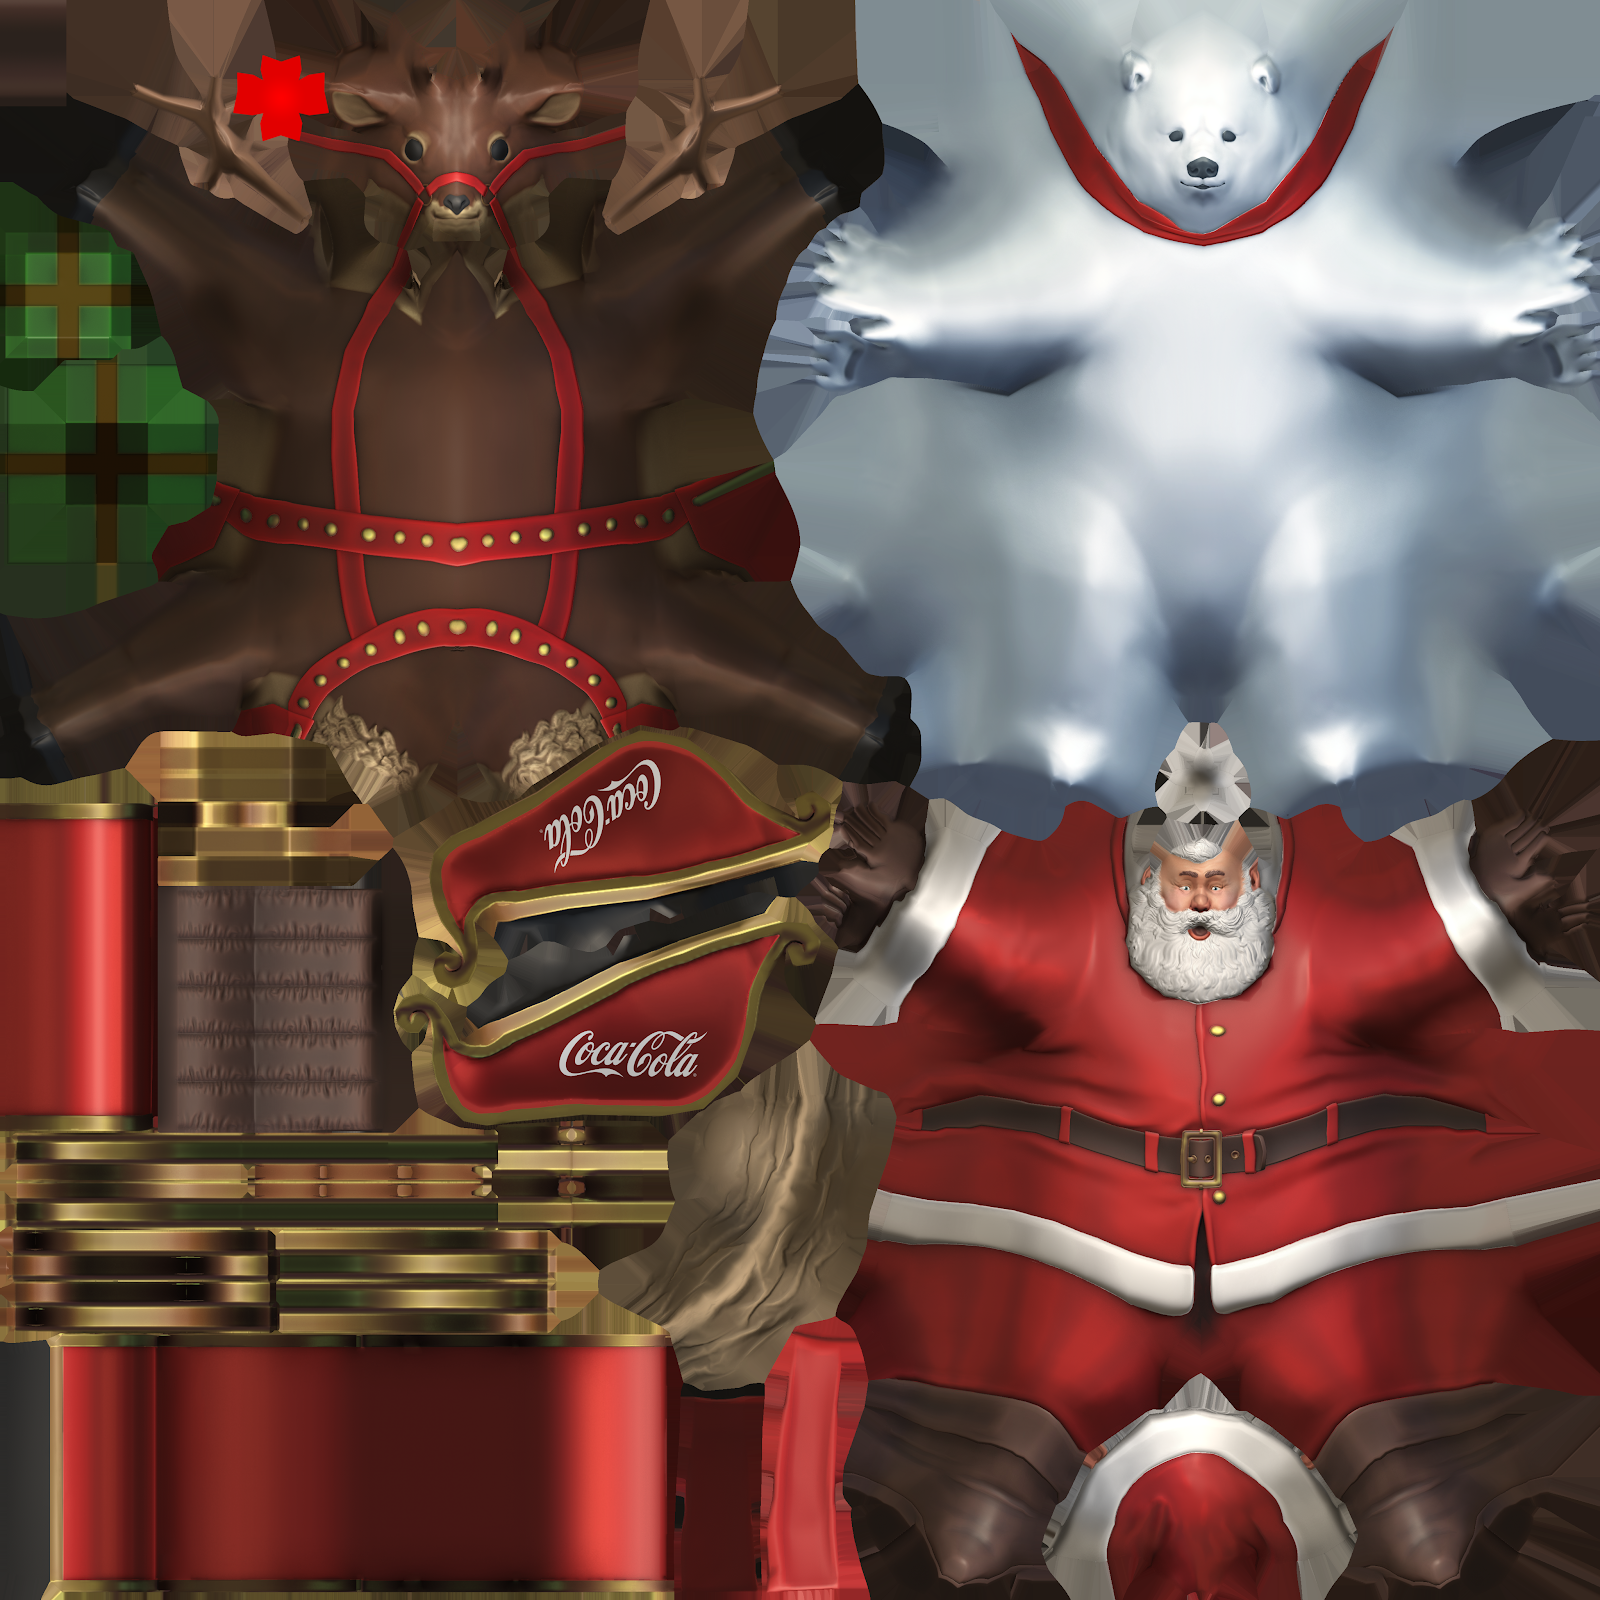
Not being able to have reflection, environment maps or is going to affect the look of your objects. It’s good to add a bunch of bezels where you can, to make your texture look more defined than your polygons are, and metals (brass/copper/gold/silver/chrome) will drastically be affected in art direction by it.
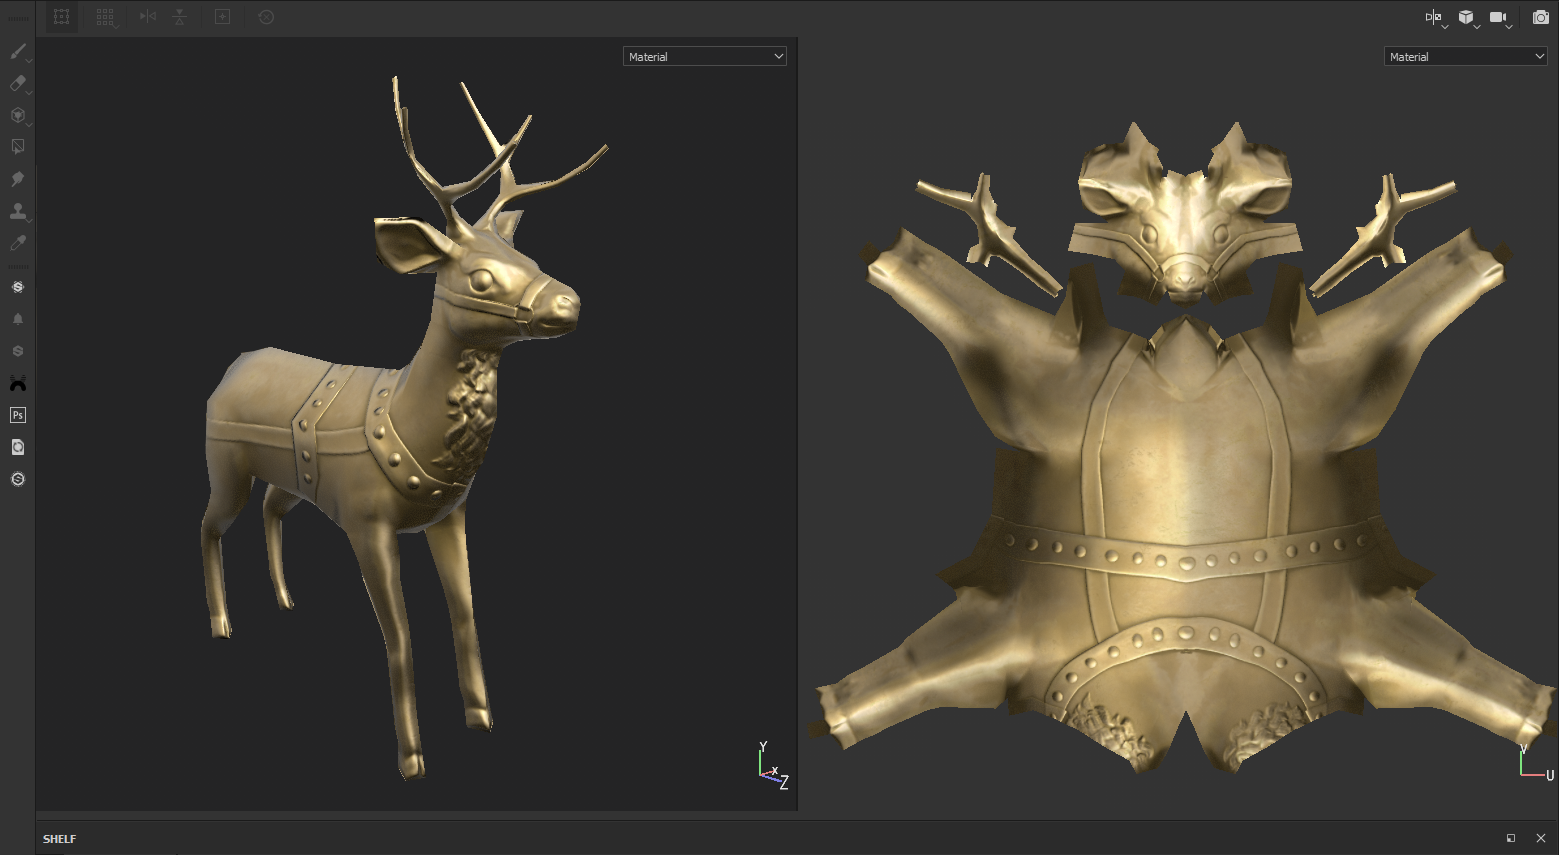
There are a load of stylized approaches in Substance, and some even based on pipelines with baked high polys, such as SoMuchMaterials.
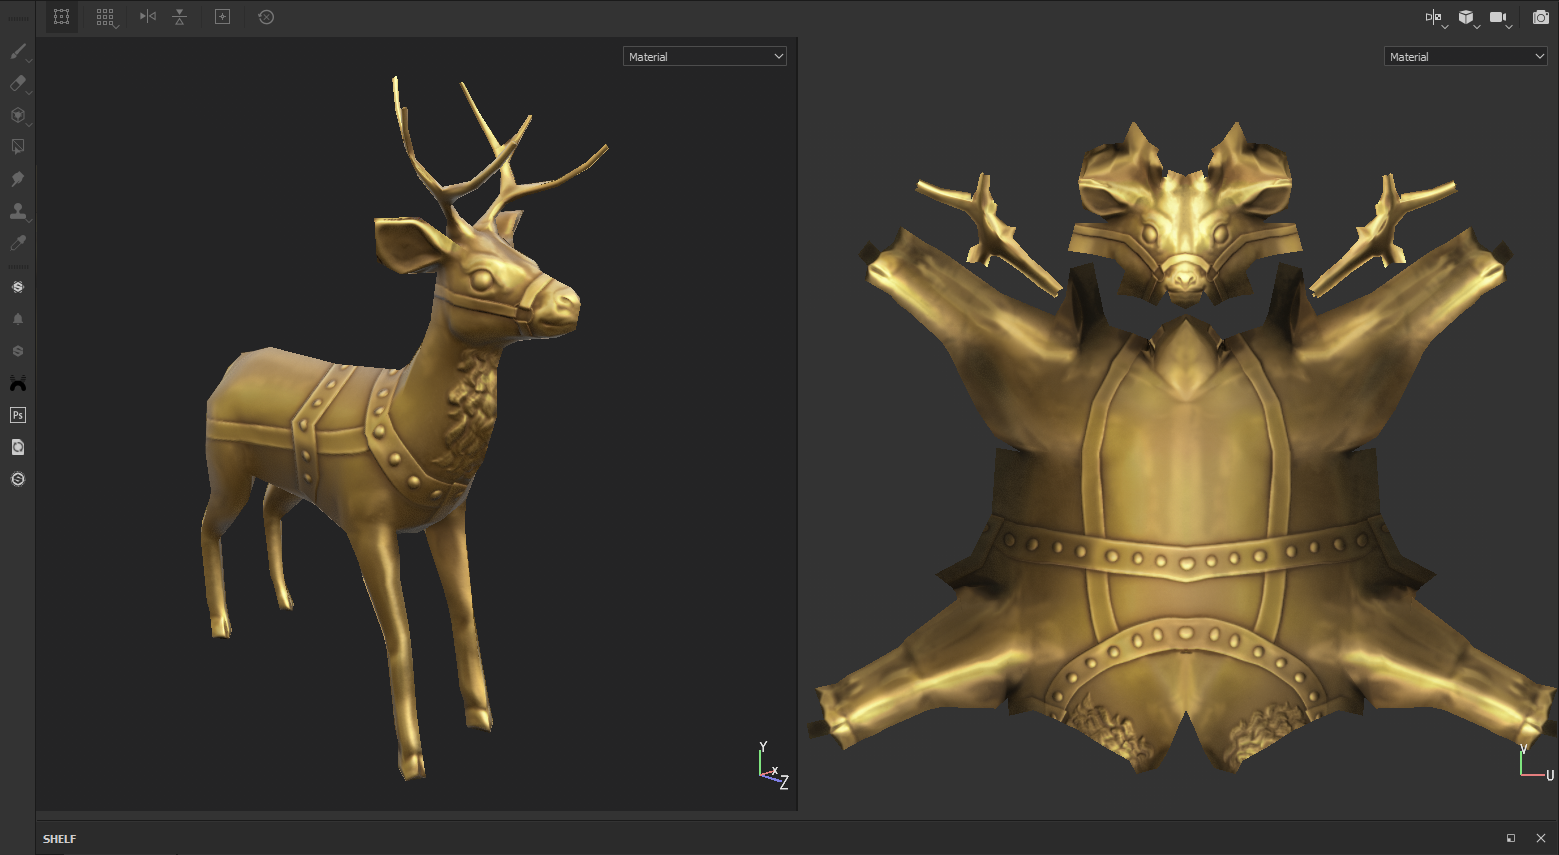
Appendix A - Video games atlases
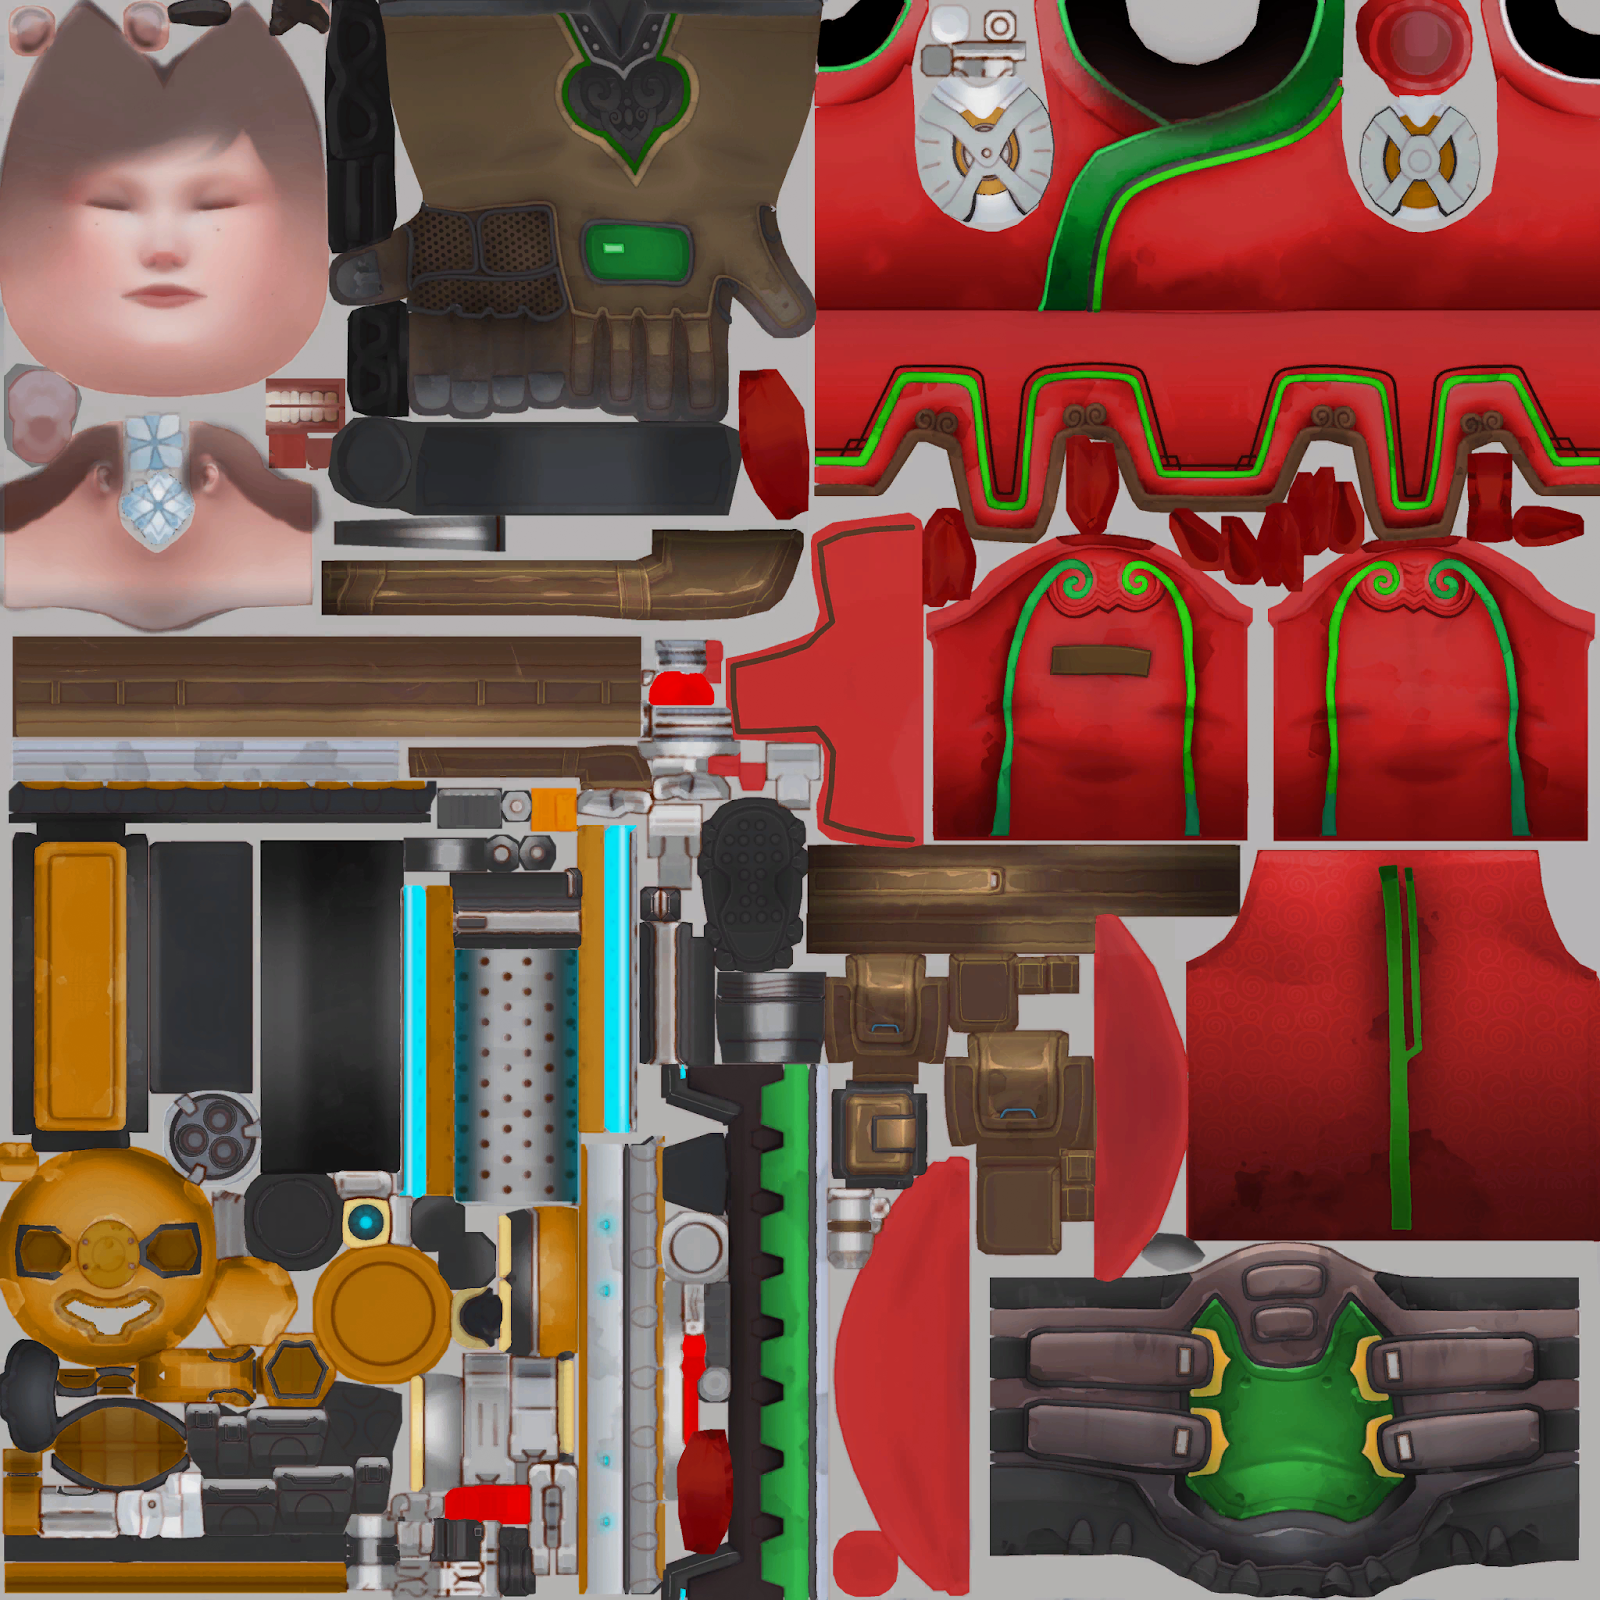
If you have to have multiple parts of your object, or maybe all your objects on one single image, then you go from textures to texture atlas. Usually way busier maps than your average textures, they are the sum of all UV shells of your model(s) in one place.
Differently to the way you’ve done it so far, where it’s more appropriate to have everything being to the same scale for good texture diffusion, you will see most realtime assets will use every single pixel of their maps to put as much content as possible, and scaling appropriately to the closest to view details, rather than uniformly.
An eye at appropriate scale could be too small to have the required details, and may be cut, and scaled to take enough pixels to get those details. Your priorities will define cluster scales.
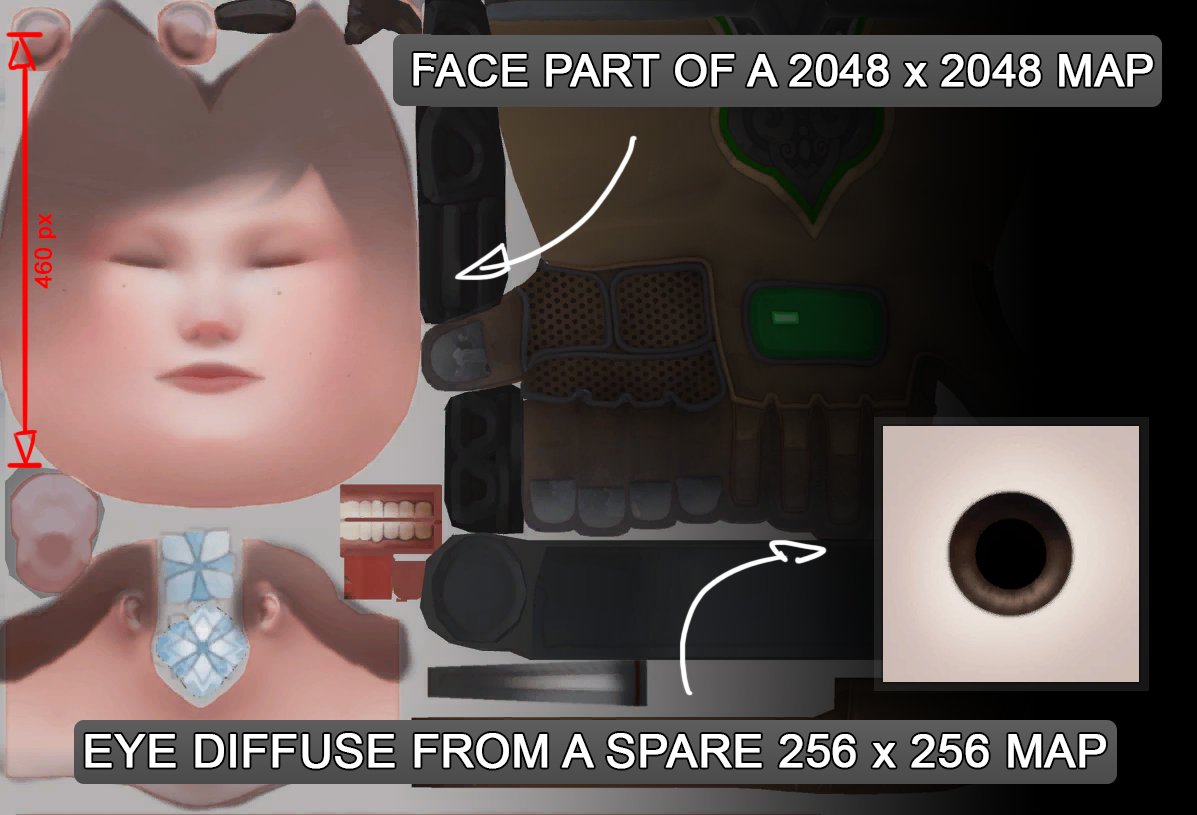
An example of how this eye map resolution needed to be higher that the scale of the face in the asset texture atlas. Pay attention to how the side and back of the face cluster is smaller than the front part of the face, the gums and teeth are only one half of it and the .
There are a lot of small savings, duplicated / cropped / stretched / collapsed maps tricks you can see on those. Some characters will have identical legs who both use the same UV cluster placement, mouth or faces cut in two to use a mirrored texture, screws and bolts cut and using all the same texture... It won’t be as extreme as putting your PBR maps in the R, G and B channels of an RGB image (without a game engine), but you can save a lot with good thinking.
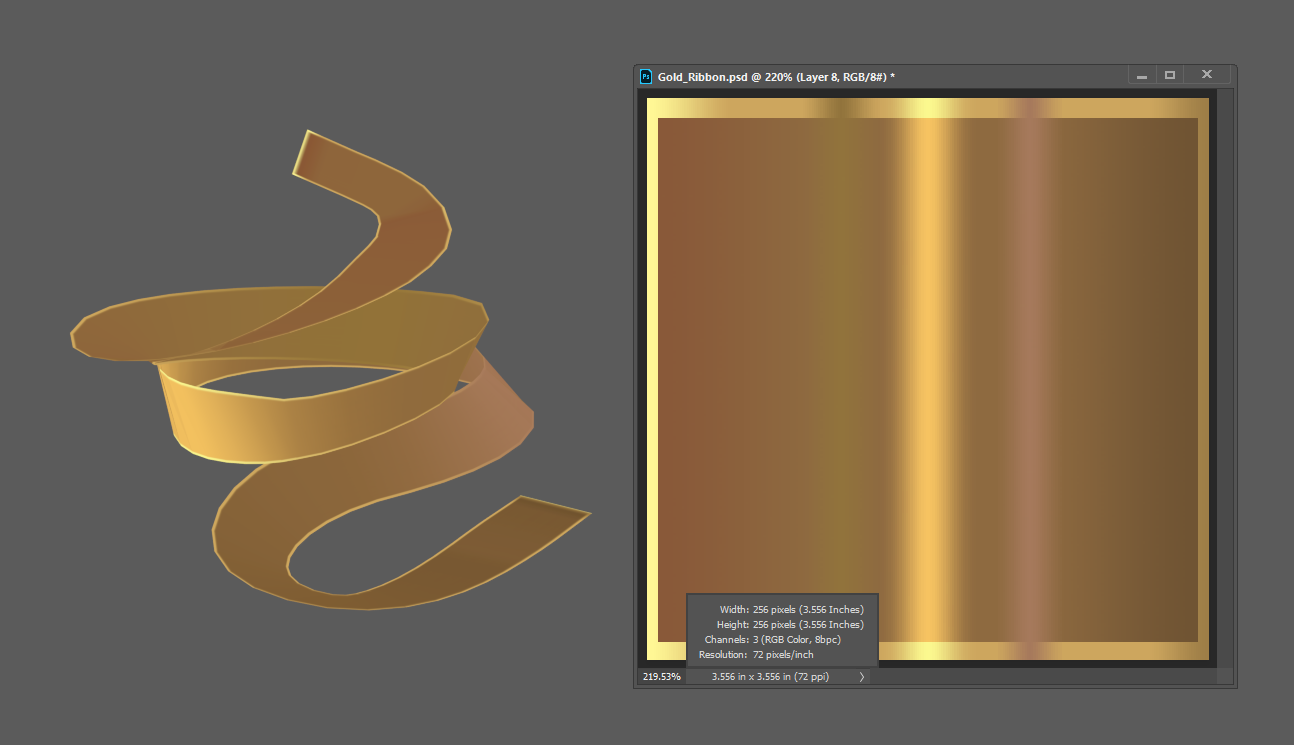
A little example: This gold ribbon, with a 256 x 256 map. The UV doesn’t match at all its shape, but it’s saving as much space as possible by being just a little square.
Appendix B - Cage baking techniques
Setting up a Cage for baking is simple, and it could help achieve the perfect baking. There’s usually no use for one, except in cases of baking a lot on really really few polygons, or getting too much baking bleeding. (Your objects are baking normals on each other.)
With Maya, make sure that all of the sub meshes are separated. The goal is to create a cage which envelopes the High Poly and Low Poly mesh as close as possible without interpenetration. I find you can obtain closer fitting cages by doing each piece separately.
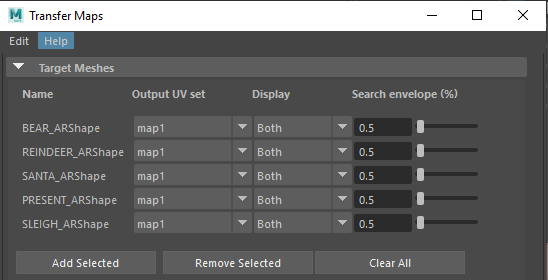
Select only the Low Poly Mesh. Change to the Rendering preset and select Lighting/Shading from the menu and choose "Transfer Maps". In the pop up, choose to show "Both" which makes the cage appear in red. Adjust the slider to expand and collapse the cage so that it hugs as close as possible.
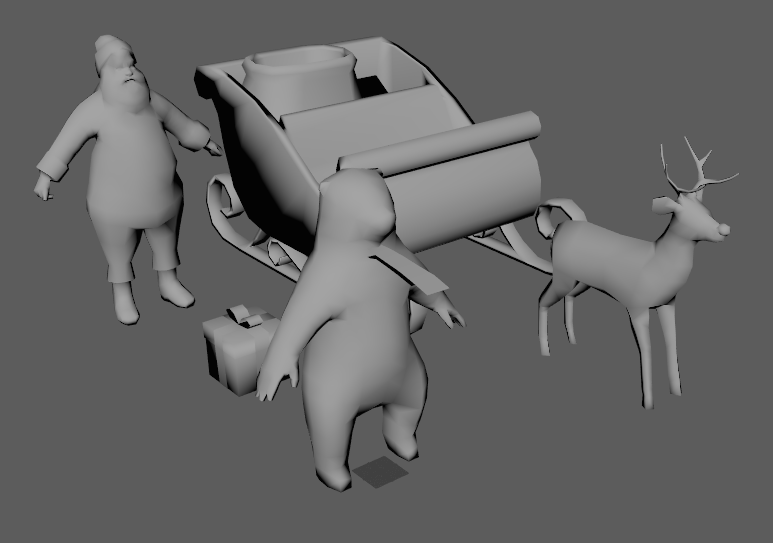
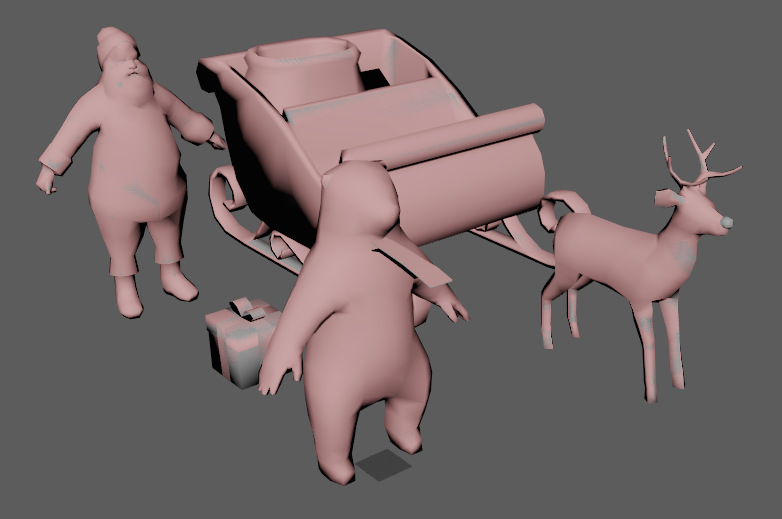
When the right size is found, click on the cage (envelope) in the viewport, duplicate it, and unparent it. Cancel the Transfer Map operation.
If you’re a 3DS Max user, the Push modifier, will give you similar results.
Appendix C - Match by Sub-Meshes Name
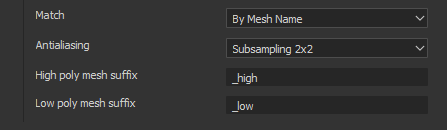
Meshes from both low and high will match according to the name before the suffix.
Santa_low matches with Santa_high / Sleigh_low matches with Sleigh_high
[Anything after the suffix is ignored.]
Following the same example :
body_low matches / body_high_part1, body_high_part2
head_low / head_high-glasses / head_highdetail /
head_highwhatever
This allows you to keep object separated while still making sure they match with specific parts of the low poly mesh.
Name matching is very precise and will take into account uppercase and lowercase. Therefore a mesh named "Mesh" will not be the same as one named "mesh". Another example with an underscore "_" being different of a dash "-". The matching by name works only with mesh name. Any container, transform or other type of resource user to organize your scene before your export will be ignored in the bakers.
Appendix D - About the current ZBrush technique
I have tried to work out how different the results would be different using the current ZBrush technique. Using a basemesh, subdivided, the Projected with the higher resolution mesh, subdivided, Projected again, until the most amount of details could be reached.
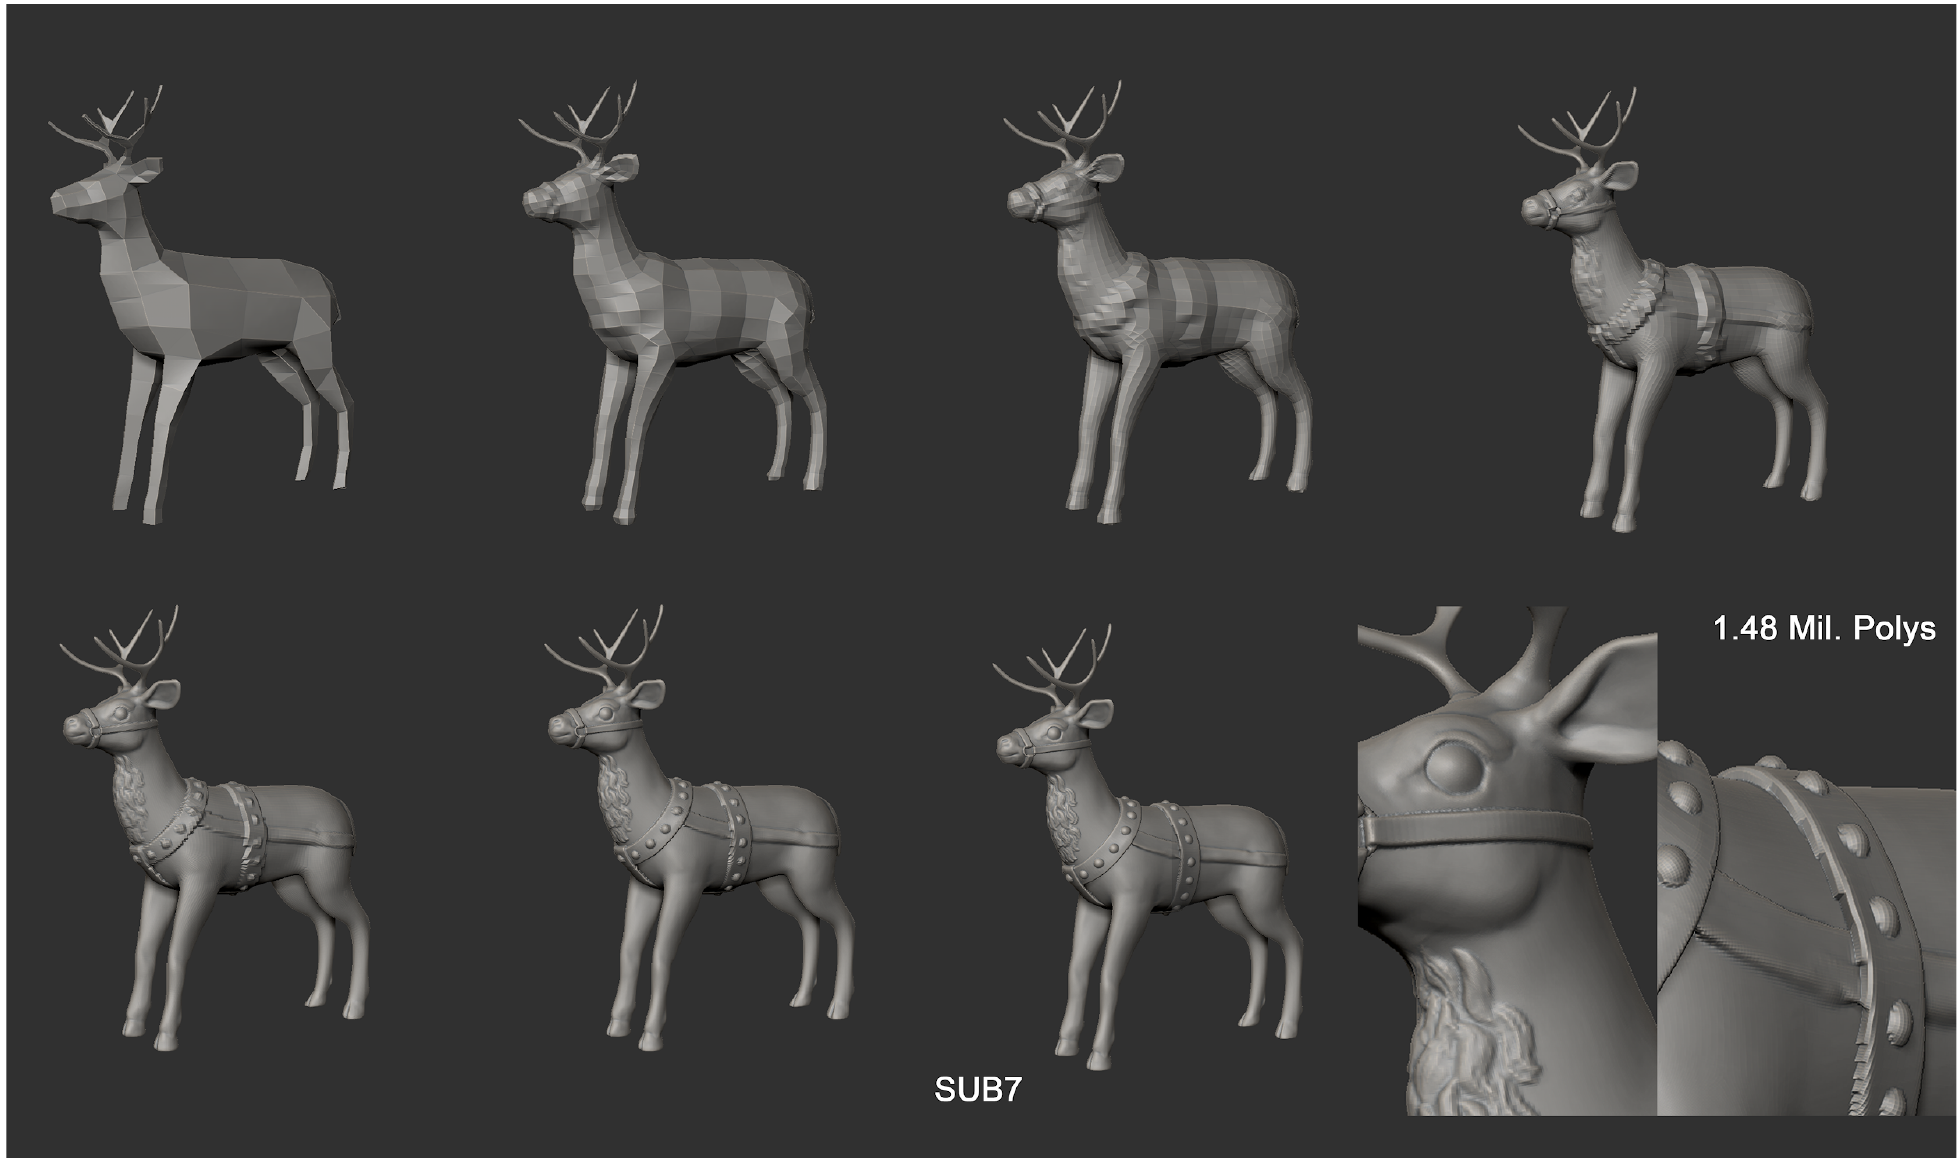
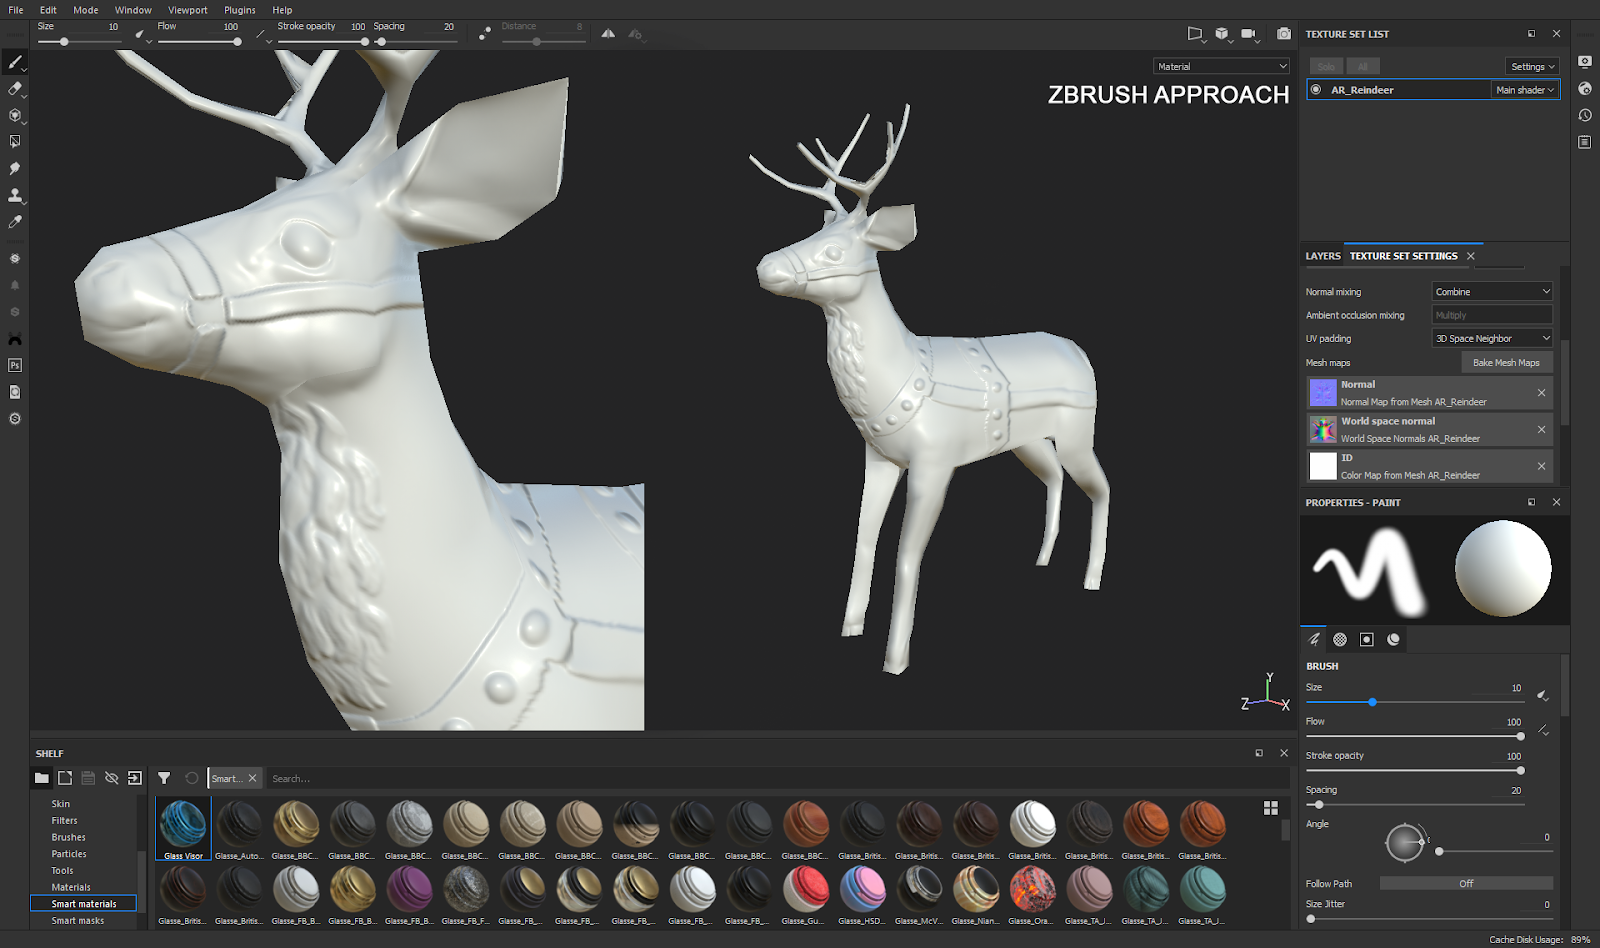
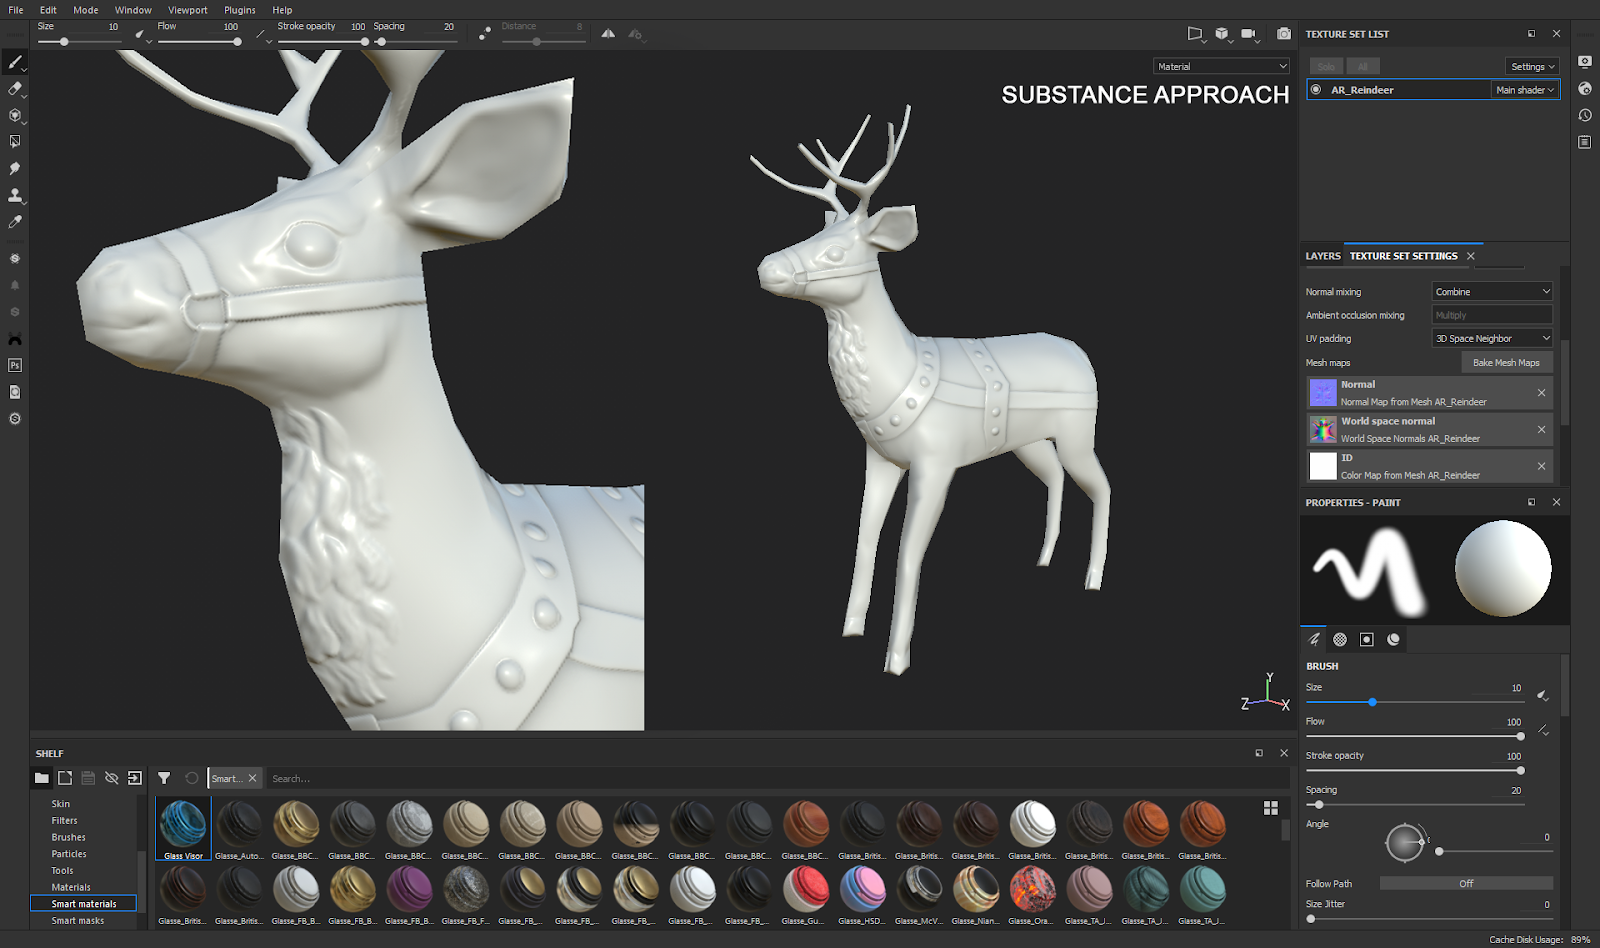
At 1.48 Millions polygons I still didn’t have the resolution I wanted around the belt, and the baking results using MultiMapExporter in Zbrush were exactly the ones I was afraid of: bad polymesh aliasing on the normals and AO maps. Plus it’s not capable of producing a curvature, thickness or world normal map.
The only reason to keep using the ZBrush approach would be for Displacement, but this is realtime oriented. If not, it’s unnecessary to go out of your way to create a subdivided asset trying to match your high polygon version, making you add more polygons in places you did not intended to.
Final note - To completely master the topic
For the most advanced questions, I would advise to watch: The Fundamentals of Perfect Baking, by Michael Hosticka.
A great watch on the topic of cage baking and more.